
Contributor
- Topics: Archive

The cover of the January 2007 issue of Pacific Horticulture featured a female Anna’s hummingbird, in flight, feeding on nectar deep inside a flower of Delostoma. That was one of the most popular covers to appear on the magazine. Responsible for that image was Bob Wigand, a garden and natural history photographer from northern San Diego County. He returns to share with us his secrets for taking such glorious photographs of birds—in the garden.
“The oriole is back. He just landed in the Australian grass tree,” my wife Judy excitedly announced. I knew that, by the time I had my camera in hand, he would be gone, discouraging me from even attempting a photograph of him.

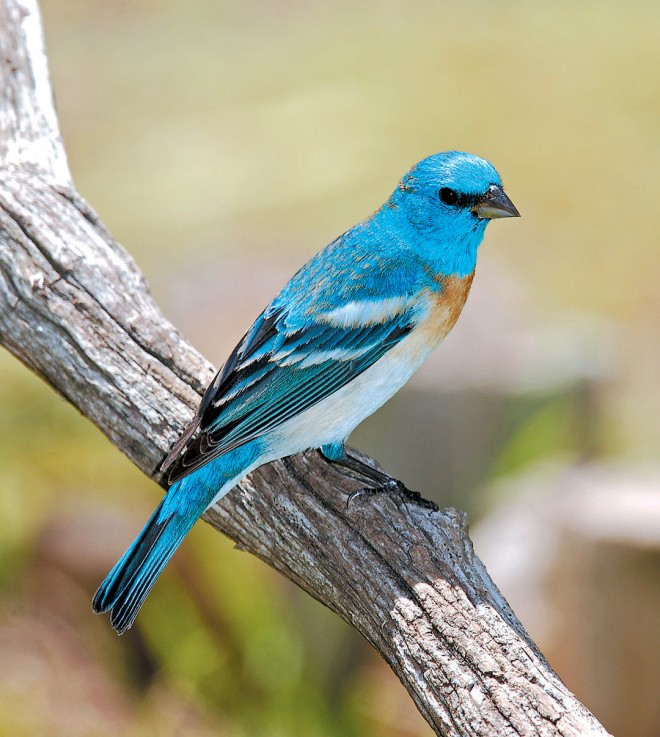
After cultivating our half-acre perennial garden for over twenty years, we had unintentionally created a wildlife habitat that attracts numerous resident and migratory songbirds to our garden. The natural environment in the greater San Diego area, with its abundant lagoons, mild weather, and miles of coastline, is rich in bird life. Inland areas offer native chaparral that attracts countless songbirds. Well over a hundred species are commonly sighted in the area year-round. It is no wonder that bird watching has become one of America’s most popular outdoor activities. This wealth of birdlife inspired me to expand my photographic skills and begin recording their visits to our garden.
Most birds are difficult to get close to; binoculars are often necessary to fully enjoy their avian behavior. Likewise, photographing them usually requires a telephoto lens for shots of birds in towering treetops or in flight. To capture images of the birds that visited our garden, I decided upon an up-close and personal approach, rather than settling for those distant images.

To start with, I needed a bird-blind that would allow me to attract birds close to my camera. I could then frame full images of birds showing their varied personalities and behavioral antics. I would still need a camera with a zoom lens, but almost any model would work since the birds would be only a relatively few feet away.
Eager to put my plan into action, I searched for a fairly secluded place on our property for the bird-blind. Both Judy and I agreed on the garden behind our home, where we had built an open-air teahouse several years before. Its private and quiet location would be ideal for watching and photographing birds unaware of my presence.
To convert the open-sided teahouse into a more concealed enclosure, I purchased camouflage fabric from a yardage store, and used it to cover the large openings by wrapping and stapling it to the structural posts. I then cut holes in the fabric for the camera lens and for an external flash; I placed the holes at my eye level when sitting in a comfortable chair inside the blind.
In order to attract more birds to this corner of the garden, I supplied three of their favorite elements: food, water, and several perching places. I wanted to be naturalistic as well as practical, so I set the stage by placing a log stump to support a large shallow terra cotta water dish. The dish is fifteen to eighteen feet away from the bird-blind; a closer placement would be possible, depending upon the range of the camera lens. I then added rustic elements, such as driftwood for perches, anchoring them around the water dish.

The birds now had a place to land and enjoy a refreshing splash. Nearby, I built a freestanding bird feeding station by positioning three eight-foot-long bamboo poles in the shape of a teepee, tying them together at the top, and hanging a feeding tray from the center. We keep this filled with a mix of bird seed.
Within about three days, the birds began to claim this area as their own. All I had to do was enter the blind and wait patiently. Usually, within a few minutes of my arrival, birds start appearing within camera range.
With the camera mounted on a tripod, facing out through the hole in the camouflage fabric, it was easy to capture relatively natural images of all the airborne visitors. Once the birds became accustomed to so many amenities always available, they returned regularly to this portion of the garden. In spring and fall, several species of migrating birds joined the year-round residents, all attracted by the water and feeding stations.
In order to photograph hummingbirds, I use a much different approach, since they are almost always on the move except for brief landings to rest, preen, or sip nectar from flowers. I use a camera with a zoom lens and an image stabilizing capability, which allows the camera to be hand held for photographing the hummers. They can be approached to within camera distance on foot. I usually follow them around the garden slowly, noticing where they hover or land. Hummingbirds are extremely territorial and can be expected to return to the same areas often, sometimes to the same perch; it’s easy to determine their favorite feeding or perching areas each day.
For more success in attracting hummingbirds, we plant perennials with brightly colored tubular flowers, such as Penstemon, Aloe, kangaroo paws (Anigozanthos), Agapanthus, Fuchsia, and a variety of colorful sages (Salvia). Hummingbird feeders can be used, but I prefer to rely on the garden’s abundant flowers to satisfy their needs; that gives me more natural photographic opportunities, which is what I prefer.

Wigand’s Photo Tips
It’s best to set up a bird-blind so that your camera will be aiming either north or south. This allows you to photograph birds at all times of the day, without the sun shining directly into your lens. Any area that offers concealment would work as a blind, such as a portion of a garden gazebo; it may even be possible to shoot from behind a curtain inside the house (be sure to remove the window screen). A pop-up dome tent can also work well as a blind.
To be ready for action, and to steady your shot, place your camera on a tripod or bean bag. I prefer mounting my camera on a tripod with a ball-head attachment, which I keep lightly tightened so that I can easily swivel to the location of the bird.
If using an external flash, place it about a foot to one side of the camera, with a cable or synchronizing cord connecting the two. The reason for using a flash attachment, whether external or not, is to fill in shadows (to avoid harsh contrasts) and to put a catch light, or sparkle, in a bird’s eye.

My personal camera of choice, for the quality pictures I desire, is a digital Nikon D300, with a Nikon AF-S 200-400 mm VR Zoom lens; I also use an SB 800 external flash. However, there are many other worthy camera brands, and almost any camera with telephoto (zoom) capabilities can be made to work for shooting birds from behind a blind. Construct the blind with an understanding of the camera lens’s range.
To “stop” a bird in action, set the camera at the highest shutter speed the flash will allow.
Use a fifteen-inch or larger shallow water dish, so that several birds can bathe at a time; this offers both reflections in the water and interactive social behavior. Try to back up the water dish and perches with flowering plants, shrubs, and trees, to create a naturalistic setting. Change the water daily, to avoid mosquito breeding and any build-up of bacteria. This is best done at the end of the day so fresh water is there in the early morning hours when bird activity is likely to be high. An occasional cleaning might be necessary if algae gain a foothold.
Furnish your blind with a comfortable chair for sitting and waiting. Other items to have on hand are spare batteries for the camera and flash, and a log book to record sightings (species, time of day, month, activities). Keep a small pair of binoculars ready to sight other birds that might be nearby. I usually have a bird book or two for identification purposes. Your bird blind can be as comfortable as you wish to make it.
Share:
Social Media
Garden Futurist Podcast
Most Popular
Videos
Topics
Related Posts
Ground Up Science for Greener Cities with Garden Futurist Dr. Alessandro Ossola
Spring 2023 Listen to the Podcast here. Alessandro Ossola is a scientist who gets very excited about the challenge of climate change allowing for an
Readying Urban Forests for Climate Realities with Garden Futurist Dr. Greg McPherson
Winter 2023 Listen to the Podcast here. “Going from the mow and blow to a more horticulturally knowledgeable approach to maintaining the landscape. And that
Low Maintenance Gardens – Better for Pollinators and People
Autumn 2022 “I come out every day. It’s therapy, my meditation.” Janet’s young garden transformed from overgrown, invasive plants to mostly natives. The dailiness of
Calochortophilia: A Californian’s Love Affair with a Genus
Summer 2022 I can chart the progression of my life by Calochortus. For the last two decades, at least. As a teenage girl growing up




Responses